In order for Screens to be able to connect back to your Mac, it needs to be configured for remote access.
There are 2 ways to configure your Mac:
- Configuring your Mac via Screens Connect (recommended)
- Configuring your Mac manually
Configuring your Mac via Screens Connect
To make the configuration easier, we recommend that you download and install Screens Connect, our free utility that makes your Mac reachable from anywhere.
Screens Connect will also make sure that all required services (Remote Management and optionally Remote Login) are enabled.
You will find instructions to install Screens Connect here.
You can now establish a connection.
Configuring your Mac manually
Enabling Remote Management
Click this link to open the Sharing settings on your Mac.
Enable Remote Management.
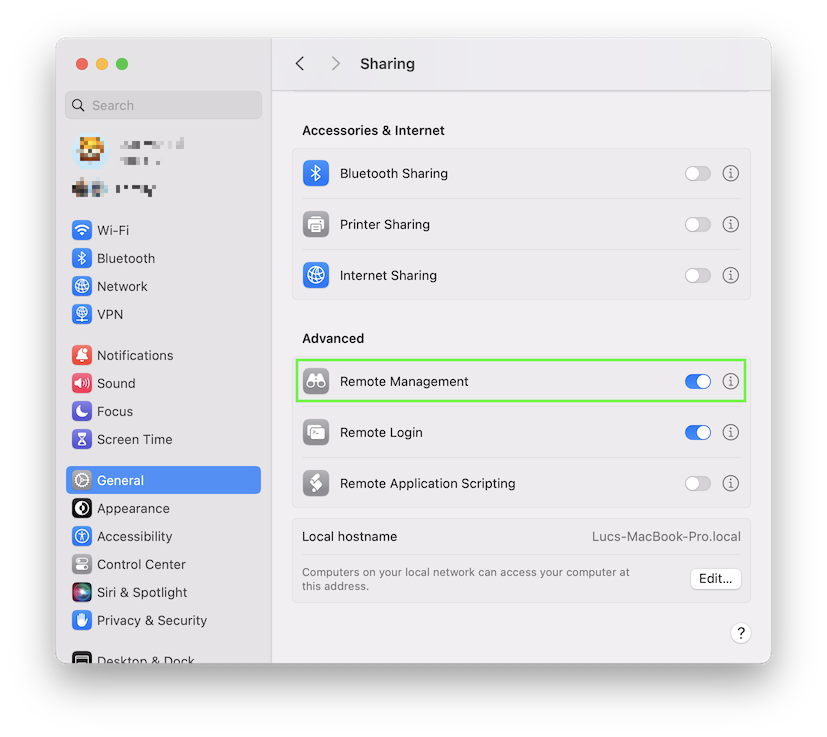
Click the ⓘ button.
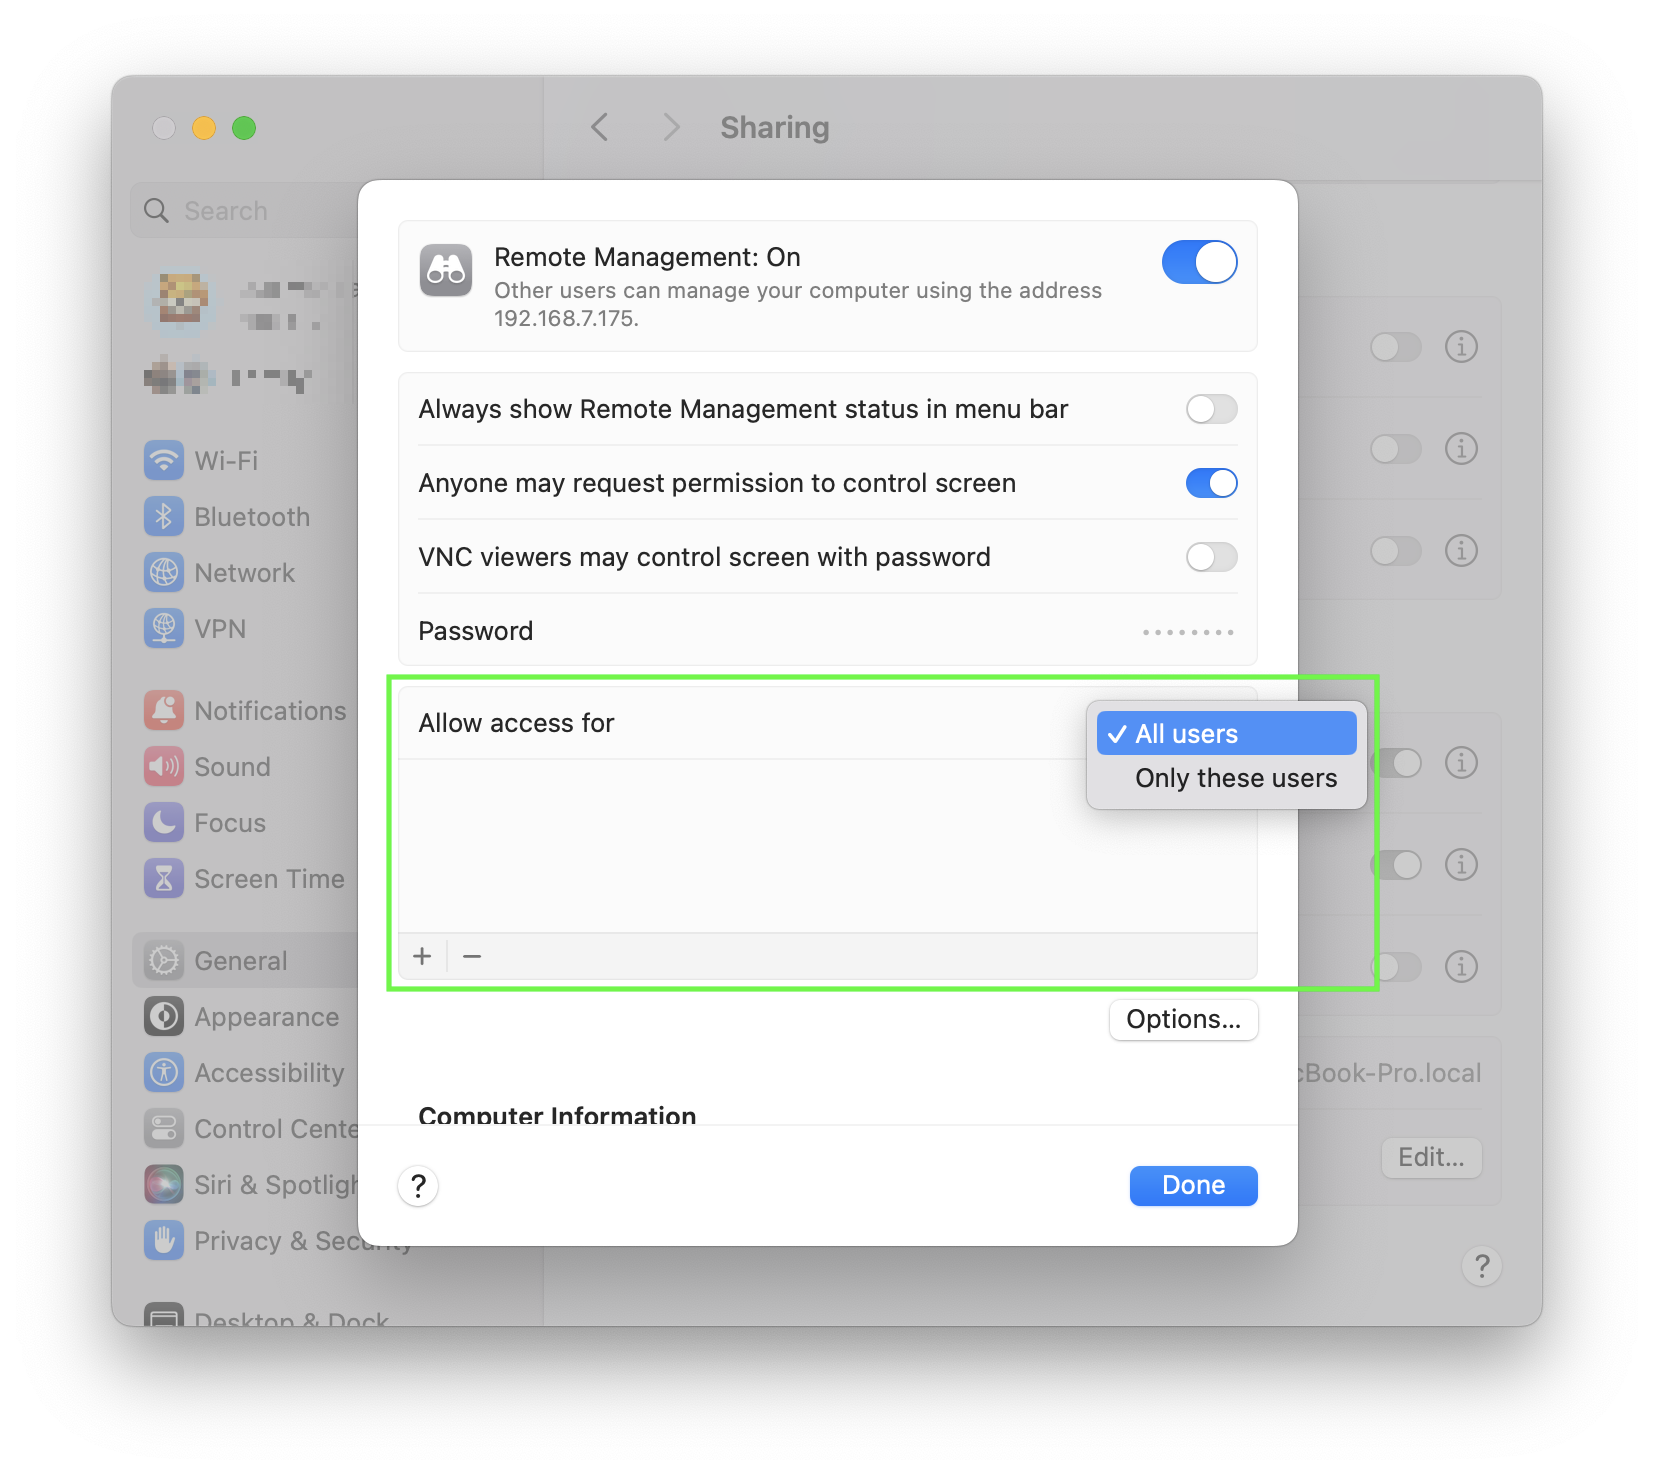
Make sure that Allow access for is set to All users or that your user is listed in case Only these users is selected.
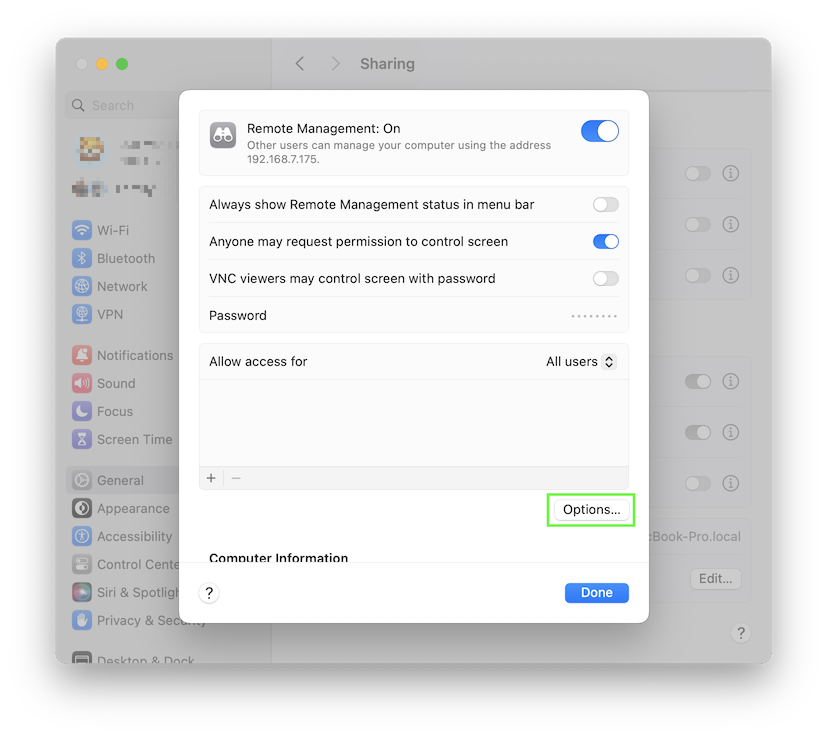
Click Options....
Enable both Observe and Control.
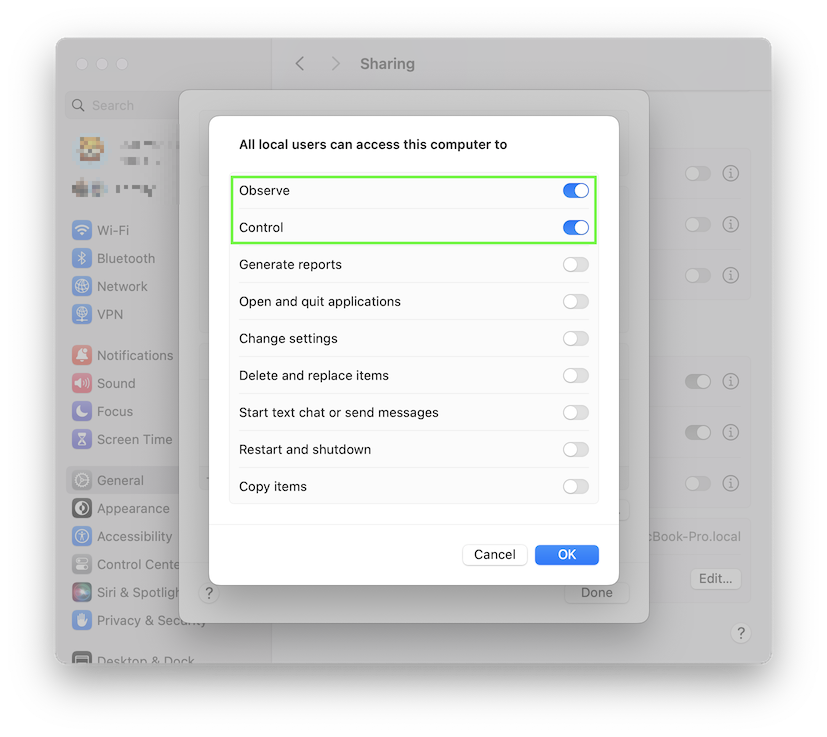
If you wish to allow incoming Screen Sharing requests from guest users, enable Anyone may request permission to control screen.
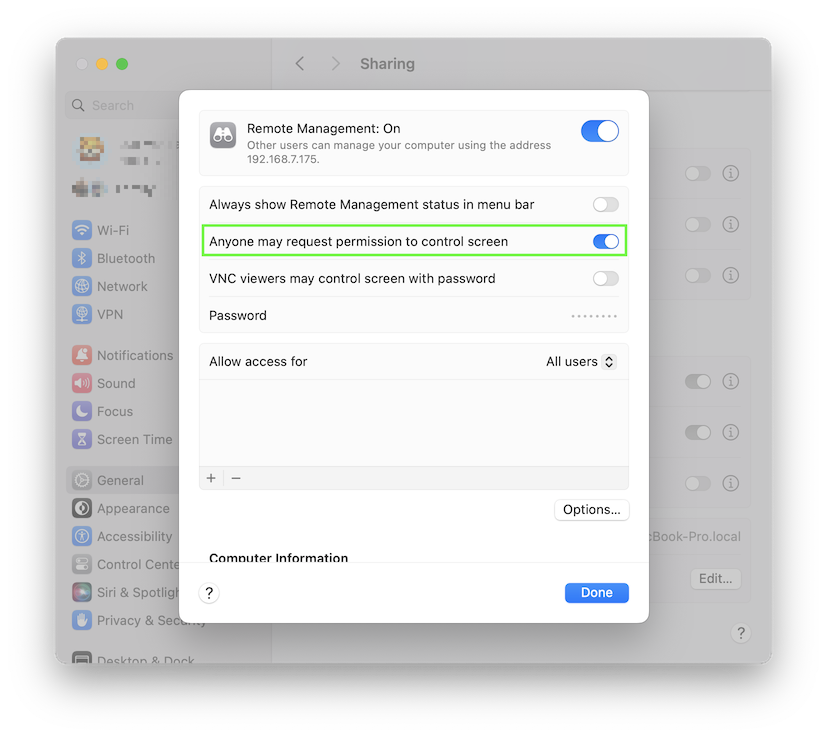
Note: under macOS 13 and later, click the ℹ️ button to access the Remote Management settings.
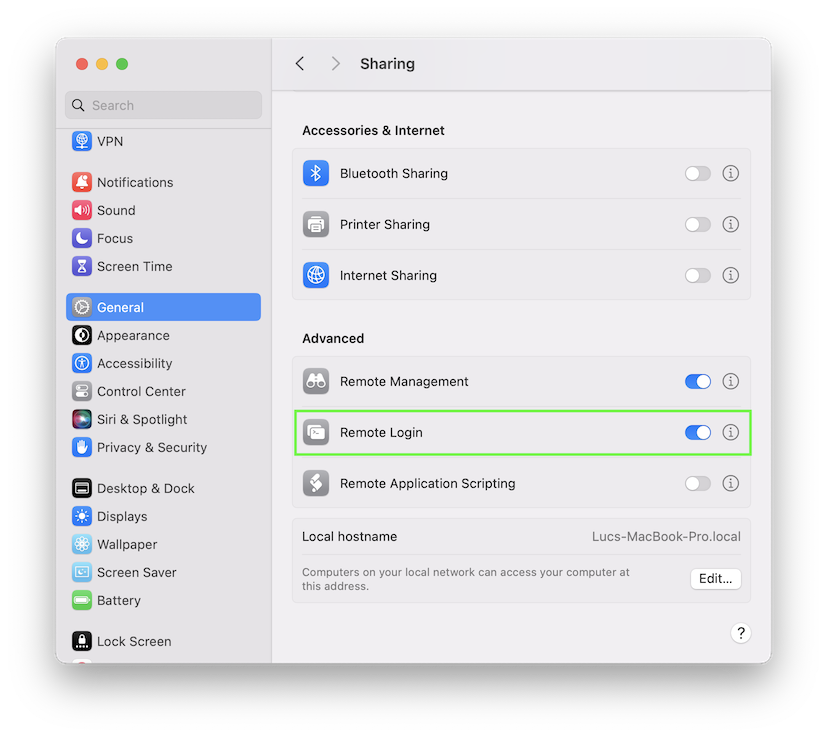
Enabling Remote Login
If you’d like to use a secure connection (SSH tunnel) while using Screens, perform these steps:
Click this link to open the Sharing settings on your Mac.
Then, enable Remote Login.
Click the ⓘ button.
Make sure that Allow access for is set to All users or that your user is listed in case Only these users is selected.
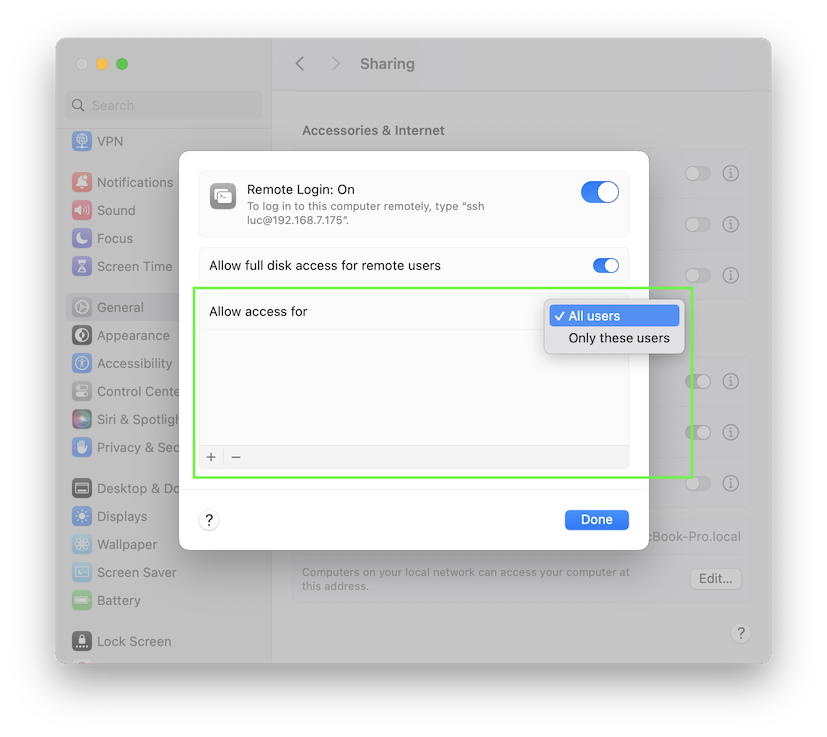
Note: under macOS 13 and later, click the ℹ️ button to access the Remote Login settings.
You can now establish a connection.